 Docs
DocsConnect WooCommerce
Install the connector, secure the merchant account, prepare products with reusable rules, and verify the complete signed order workflow.
What the connector does
The WooCommerce plugin connects a WordPress store to its protected Total Print Hub merchant workspace. A WooCommerce-only merchant does not need a Shopify store. Total Print Hub remains authoritative for product design configuration, printing prices, rendering, saved designs, and production data while WooCommerce continues to own the product catalog, checkout, orders, inventory, and tax behavior.
- WooCommerce 10.9 or later and WordPress 7.0 or later
- HPOS-compatible order storage
- Native product-page workspace; no customer-facing iframe or standalone Instant Merch page
- Classic and block cart/checkout compatibility
- One merchant account can connect authorized Shopify and WooCommerce stores without creating duplicate workspaces
- Fail-closed storefront behavior whenever the connector is unavailable
Connect the store securely
The official connector is preconfigured for https://app.totalprinthub.com. A merchant never pastes an API URL or access token and never gives Total Print Hub a WordPress password. Local URL overrides are accepted only in an explicit WordPress debug environment for isolated development testing.
- 2.1
Install and activate the official Total Print Hub connector ZIP in WordPress.
- 2.2
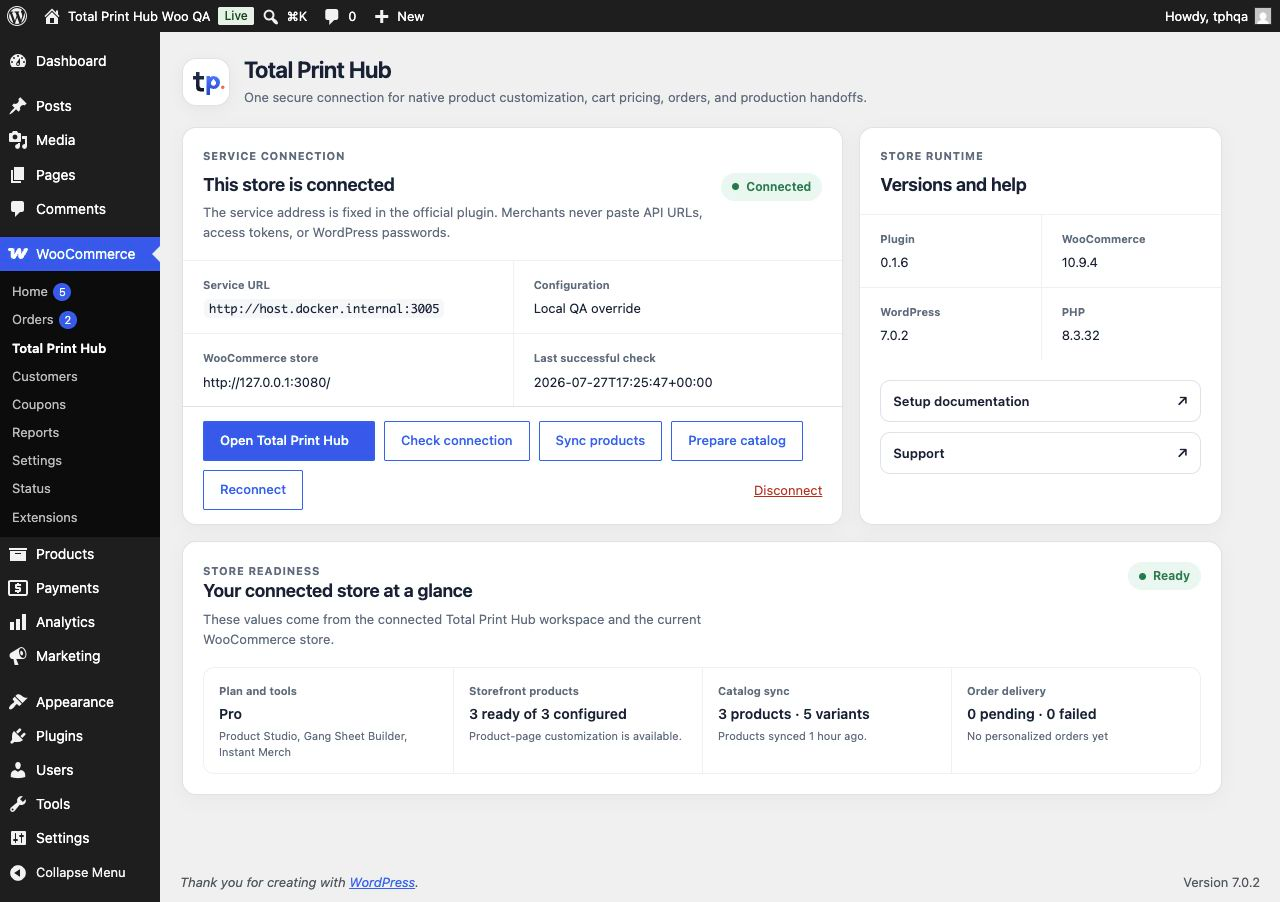
Open WooCommerce → Total Print Hub and choose Connect to Total Print Hub.
- 2.3
Create or sign in to the Total Print Hub merchant account, verify its email address, and complete authenticator MFA.
- 2.4
Approve the exact WooCommerce site and the current authorized WordPress administrator.
- 2.5
Return to WooCommerce for the automatic one-time proof-key exchange.
- 2.6
Confirm Connected, the current plugin and store versions, and a successful recent health check.
Prepare products without mapping them one by one
Create reusable product templates and saved category, tag, SKU, or product-family rules in Total Print Hub. WooCommerce then sends the exact product and variation facts into that same product-setup engine; it does not create a second Woo-only template system.
- 3.1
For one product, open its normal WooCommerce edit screen and choose Prepare with saved rules.
- 3.2
For a selected group, use the Products table bulk action Prepare with Total Print Hub rules.
- 3.3
For the store catalog, open WooCommerce → Total Print Hub and choose Prepare catalog. The job runs safely in pages in the background.
- 3.4
Review products that did not match a saved rule instead of forcing an uncertain setup.
- 3.5
Choose Sync products after changing WooCommerce variations or after completing setup in Total Print Hub.
- 3.6
Use the Total Print Hub product panel or bounded bulk actions to enable or disable customization for prepared products.
Verify the customer and production path
- 4.1
Open the real WooCommerce product page and confirm that only the product's prepared colors, sizes, sides, print regions, prices, and enabled experience appear.
- 4.2
Complete a real artwork upload or design and verify the preview, quantity, authoritative quote, and cart line.
- 4.3
Finish checkout and confirm one HPOS-safe WooCommerce order creates one tenant-scoped Total Print Hub order and production handoff.
- 4.4
Verify artwork resources, design/export files, refund handling, retries, and disconnect behavior before launch.
- 4.5
Repeat the launch on desktop and phone and on every supported storefront theme used by the shop.
Operate and disconnect safely
- The connector reconciles its WordPress, WooCommerce, and plugin versions through a replay-protected health request.
- Order and refund events are idempotent so WooCommerce retries do not create duplicate production records.
- Disconnect revokes the server installation before removing local connection material.
- Uninstall removes connector secrets and scheduled jobs while preserving merchant data according to the configured retention policy.
- Never place connector secrets, customer artwork, signed download links, or store credentials in support messages.